Introduction
Classroom Learning Spaces within the college are configured with a cabinet at the head of the classroom (sometimes referred to as the lectern or podium) along with a desk phone, and in-unit computer with mouse and keyboard, a microphone for voice re-enforcement, a small room control button panel, and a large room control touch panel display with a preview image of what to present to the data projector (and sometimes additional displays).
Note: For legacy rooms that use the following interface from a small control touch screen on the lectern, please use the eClassroom (legacy) Guide instead.

Startup/Shutdown
Easy Start
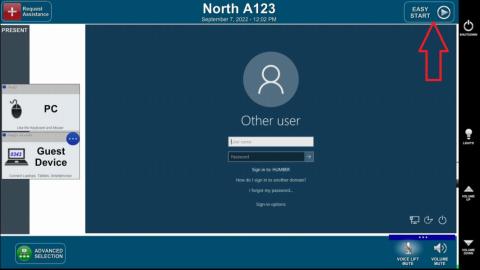
Select Easy Start in the top right corner to quickly turn on the system. This will turn on the projector and set up the room with PC as the main image. If the screen is black, make sure to wake up the computer by clicking the mouse or keyboard or by turning the computer in the cabinet on. For more technology enhanced rooms (like Global or Collaborative) this will also turn on all the displays of the room and have the correct default source presented on them.
Selective Startup
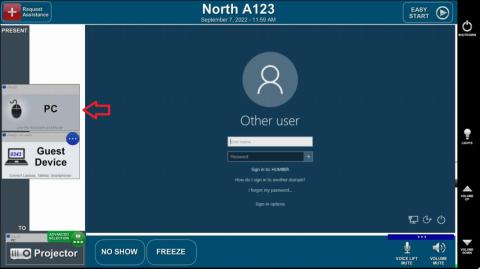
Select the source you want to present from the left side of the screen. This will turn on and display that source on all displays in the room. (Note: The same options are also available on the left side of the button panel.)

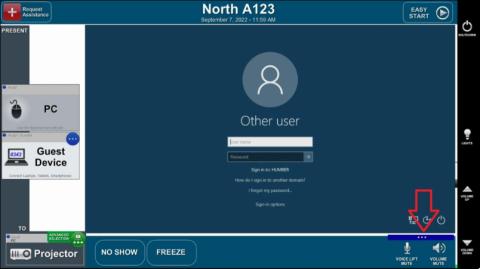
Shutting Down
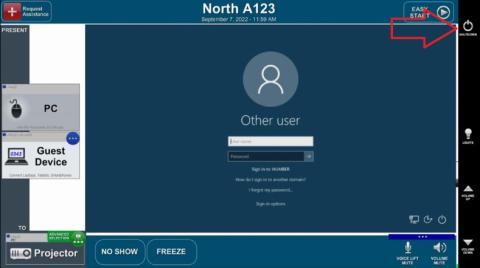
- Press the SHUTDOWN Power icon in the top right corner of the control touch panel. (Note: The same option is also available on the top right side of the button panel.)
- A Pop-Up menu will appear. Confirm the request by pressing the green checkmark. Pressing the red X will cancel the request and return you to the main touch screen menu. If no selection is made by the time the countdown reaches zero, the room will automatically shutdown.
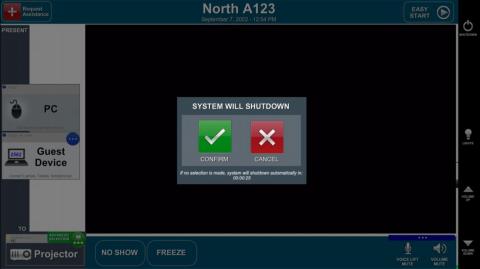
When the room shuts down all displays will turn off, the motorized screen will raise, lights will turn on, and any Guest Device users will be disconnected. The PC will display on the preview monitor to remind the user to logoff or shutdown.
Using the Computer
Displaying a Presentation
If not selected already, select the PC source on the on the left side of the control touch panel (or the button panel) to use the computer in the cabinet. All displays will show the same image, with the computer desktop.
Startup/Shutdown
Ensure that the computer in the cabinet is powered on. If it is not, press the Power button on the computer. If the computer is just asleep you can also click the mouse or press a key on the keyboard.
When you are finished using the computer remember to shutdown, restart, or log off the computer by clicking the Start button and selecting Power in Windows and choose the respective option. This must be done manually and will not be done by the system.
Using a Guest Device (Laptop, Tablet, Phone, etc)
Displaying a Presentation
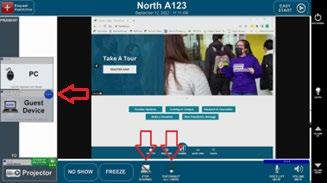
If not selected already, select the Guest Device source on the left side of the control touch panel (or the button panel) to use a guest device. All displays will show the same image, with on screen instructions how to connect.
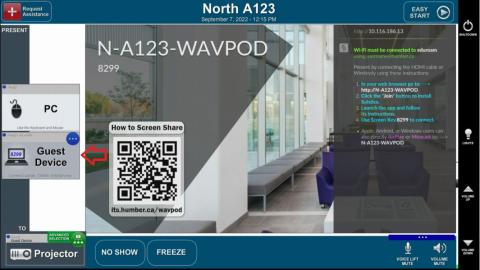
Connecting Wirelessly (no cables)
Wi-Fi must be connected to eduroam using username@humber.ca
- In your web browser go to: ---> http://[CAMPUS LETTER]-[BUILDING AND ROOM NUMBER]-WAVPOD
- Click the "Get the App" button to install the app.
- Launch the app and follow its instructions.
- Use Screen Key [4-digit number] to connect.
Note: Apple, Android, or Windows users can also directly AirPlay or Miracast to the same address without downloading the app.
For more details on how to connect to eduroam, please visit the Eduroam Guide.
Connecting via HDMI cable
After selecting the Guest Device source:
Connect an HDMI cable between your auxiliary device (laptop, tablet, document camera, etc.) and the HDMI port on the side of the cabinet or wall. Your device should automatically detect the system and display out.
You can manually output from your laptop using the below:
- Windows Laptops: Press Windows + P and select Duplicate or Extend.
- Macintosh Laptops: Open the System Preferences (from the Apple menu), select Displays, and then click Detect Monitor.
IMPORTANT: Cables and adapters are not provided at the lectern. Users must bring their own.
Controls
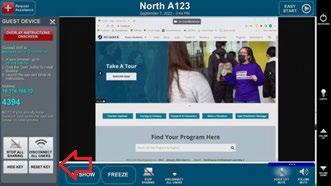
When users are connected or sharing new buttons DISCONNECT ALL USERS and STOP SHARING will appear respectively at the bottom of the control touch panel. With these buttons you can kick off all users from being connected (and a new 4-digit key will be generated) or just stop all content being displayed (wired and wirelessly) so users don’t have to reconnect.
To repeat the connection instructions and additional controls you can also select the blue three dots on the Guest Device source. From this menu you can regenerate a new 4-digit key by selecting ‘RESET KEY’.
Collaboration
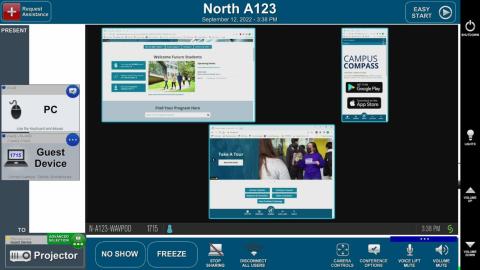
Multiple users can connect wirelessly and wired at the same time for a multi-image collaboration. Although there is no limit it is best practice (because of screen space) not to exceed 4 posts presenting at the same time (however unlimited users can still be connected for group features like the ink laser pointer). Using the App, the images can be arranged in the Layout section.
Controlling the Environment
Presentation Volume
Volume levels are adjustable using the Volume Up, Volume Down, and Volume Mute buttons on the bottom right corner of the control touch screen. You can also use the rotary knob and Speaker Mute button icon on the right side of the button panel.
Using any of these buttons (or the blue button with three dots in the same area) will popup a volume control slider you may also use to adjust audio levels.

Microphone Voice-Lift Volume
Podiums are equipped with a microphone for sound reinforcement in the room. These volume levels are adjustable using the Voice-Lift Mute button on the bottom right corner of the control touch screen (or the button panel).

Using these buttons (or the blue button with three dots in the same area) will popup a volume control slider you may also use to adjust audio levels.

Lights
In many classrooms, lighting controls are available from the control touch panel which is identified by the Lightbulb icon on the right side of the control touch screen. Press this button to display the Lighting Control pop-up menu. You can select a scene or choose a level on the slider to adjust the lights. You may also use the lighting buttons on the right side of the button panel.

Projection Screen
In rooms with motorized projector screens, the manual controls for raising and lowering the screen are located with the Lighting Control pop-up menu. Press the Lightbulb icon on the right side of the control touch panel to display the Projector Screen control pop-up menu. You may also use the screen up and down buttons on the button panel. Note: The projector screen will automatically lower and raise with the system start up and shut down.

Image No Show
When pressed, the No Show button temporarily “mutes” the projected image by displaying a black image. Pressing the button, a second time restores the source image. The preview image on the lectern monitor will not be affected. (Note: This button will appear when the system is on.)

Picture Freeze
When enabled, the Freeze button pauses the projected video signal on a still frame. Press a second time to restore motion. The preview image on the lectern monitor will not be affected. (Note: This button will appear when the system is on.)

Conferencing
Some rooms are equipped with cameras and microphones for video conferencing. Conferencing is accessed by selecting ‘Easy Start’ and logging into the PC. You may use Microsoft Teams or download a video conferencing client of your choice.
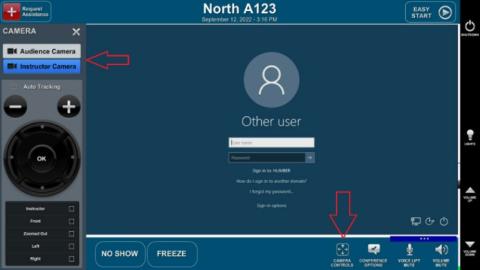
Camera Control
Some rooms are equipped with a camera connected to the PC for video conferencing. If available, select ‘Camera Control’ at the bottom of the control touch panel. If there are multiple cameras connected you can select which camera to control. Some cameras have an Auto-Tracking feature that can be turned on or off that will allow the camera to automatically zoom in and follow a user who is moving in front of the room.
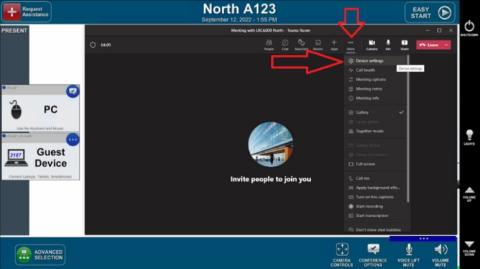
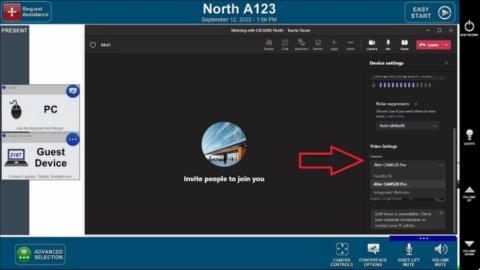
To change the camera in Teams, select Device Options in Teams and select the other available camera under Video Settings. (Note: Camera names will be different depending on system.)
You can save a camera pre-set by holding the named pre-set button (will be named something like Instructor, Audience, Front, Back, Close Up, Zoomed Out, Left, Right) for 5 seconds until the green check mark is displayed.

Conferencing Microphone Control
Some rooms are equipped with microphones connected to the PC for video conferencing. If available, select Conference Options at the bottom of the control touch panel. You can mute participants in the front of the room (usually the presenter), participants in the audience, or everyone (selecting both options).
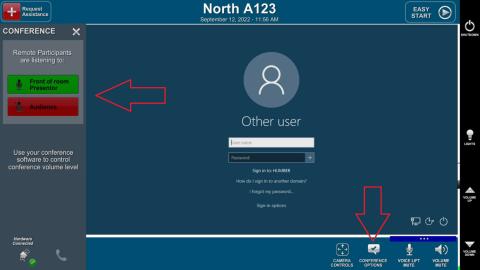
There will be an LED indicator on the ceiling microphone to match the above. RED light means the microphone is muted; the GREEN light means the microphone is ready.
Help & Support
There are 3 ways users can request immediate support:
- Phone: Use the in-room telephone (available in most learning spaces) and select the I.T. Support Centre option or call extension x8888 to speak to an Analyst
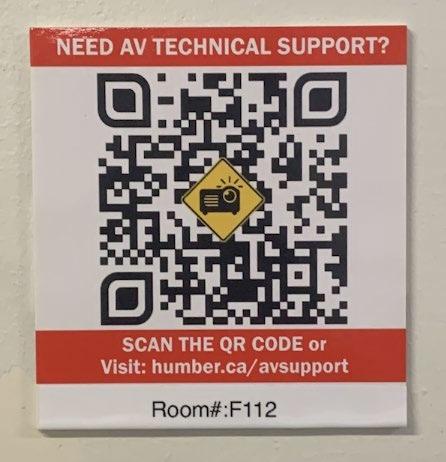
- QR Code: Using your mobile device camera and photo app, scan the QR code (located on or near the lectern or cabinet) and fill out the details of the issue or help needed. Learn more about How to Scan a QR code for In-room AV Support. The room number is printed at the bottom of the QR code. Once submitted, a technician is immediately dispatched. You can also find the form at AV Support.
- Control touch panel: Using the control touch screen select the Request Assistance button in the top left corner. This will open a menu with the devices that are being used in the system. Select one of these options and a pop-up menu of the message that will be sent will display. Select Send to Technician and a technician is immediately dispatched with all the details.
