Introduction
This guide offers detailed instructions on how to start a meeting, join a meeting, and record a classroom session utilizing Teams Classroom technology for flexible teaching sessions. Please refer to the Teams Classroom Technology guide to get familiar with the technology in the room.
Starting a Meeting
Scheduled Meetings with the Room (recommended):
- If the meeting is scheduled with the room, select the Join option on the panel in the room.
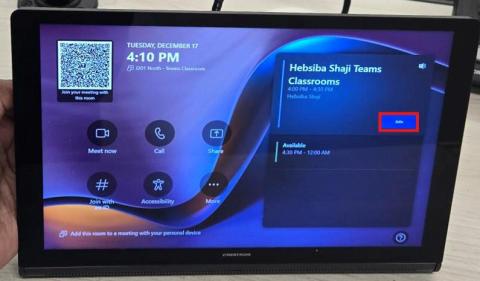
Note: This method works whether you are using your own device or not.
Scheduled Meeting Using Your Own Device:
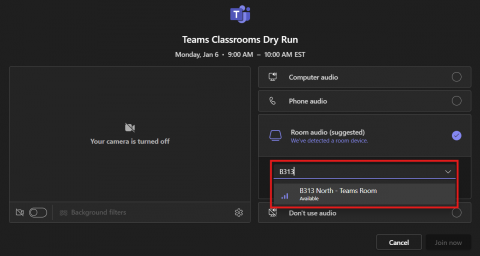
- If the meeting is scheduled on your calendar, select Join on the Teams meeting as you normally would.
- Ensure that your personal device has Bluetooth functionality turned on and select Room audio (suggested) and enter the room name to invite the room to the meeting.
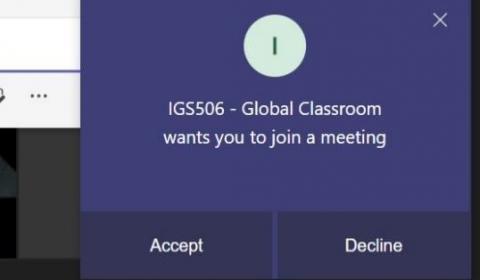
- In the Teams panel, press Accept to join the meeting.

Unscheduled Meetings:
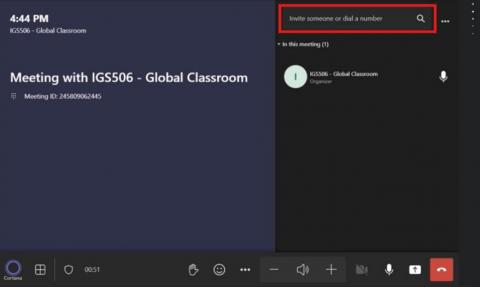
- If the meeting has not been scheduled either in the room or on your calendar, please press the Meet Now button on the Teams panel to initiate a meeting.
- Add yourself or participants to the meeting by entering their Humber email addresses in the box on the right.
- Accept the Teams notification on your laptop by clicking on the Accept option.
- Ensure that Bluetooth is enabled on your personal device. On the next screen on your laptop, select Room audio and type the room you are in.
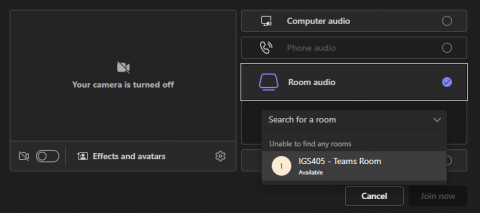
- Selecting the Room audio option will use the room’s camera, mic, and speaker, and turn off your personal device’s mic and camera. Once you are ready, click Join now to join the call.
- To invite another remote participant to the meeting, follow steps 2 and 3. Alternatively, click More > Meeting info > Copy join info in the meeting window and share this meeting information with your remote participant. The remote participant will be able to see you through the instructor camera and the audience through the audience camera when they join the call.
Note: This approach is most effective for small groups (1 or 2 individuals). For larger groups, it is recommended to schedule meetings with the Teams classroom.
Joining a Meeting
In-Person Students:
Students attending in person should choose Don’t use audio (suggested) when joining the meeting to prevent feedback issues.
Remote Students:
Remote students can join the meeting by using the meeting information provided by the instructor. Please refer to Step 6 under Unscheduled Meetings to find instructions on how to locate the meeting info.
Recording a Meeting
- Under the meeting controls at the top of the Teams meeting interface, click on More > Record and transcribe > Start recording to start recording the session.
- A notification will appear in the meeting chat to inform all participants that the meeting is being recorded.
- To stop recording, click on the More button again and select Stop recording from the drop-down menu.
- Once you stop recording, you will see that the Meeting Chat has saved the recorded session. The recorded meeting will be saved to Microsoft Stream, where you can view, download, and share the recording with others.
- To change the recording and transcript settings before or after a meeting, open the meeting from your Teams or Outlook calendar, press the Ctrl button, and select Meeting options.
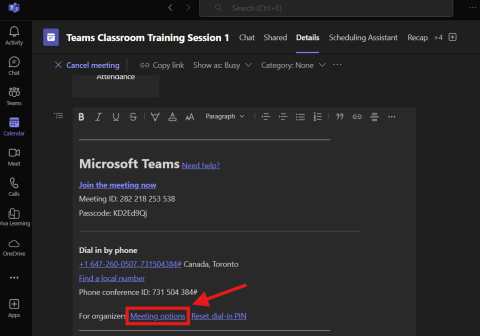
- On the next screen, select the Recording & transcript option from the left-hand menu. You will find options to modify permissions for automatic recording and transcription, designate who can record and transcribe, and change access settings for the recordings. Adjust as desired changes and click Save icon on the bottom.

Important Note: If you intend to record your meetings, it must be selected from your own device such as a laptop or tablet. The recording function is not available on the Podium PC.
Requesting Assistance
- To request assistance, press the Request Assistance button on the top right corner of the podium PC and choose the type of your request.
- This will generate a ticket and notify the technicians, and the assigned technician will come to your classroom promptly. Response time may vary based on volume of tickets, but classroom requests are prioritized.
- Alternatively, you can use your personal mobile device to scan the QR code in the room to request assistance, which will also generate a ticket that will notify our technicians.